The Art of Leather Finishing
Posted on
Techniques Every Crafter Should Know
Leather finishing is where craftsmanship meets creativity. It’s the final touch that not only enhances the beauty of leather but also protects it. Whether you’re an experienced artisan or a DIY enthusiast, understanding how to properly finish leather is key to creating durable, professional-looking pieces that last for years.
From smooth aniline leather to split leather, the right finish can transform your work. Using natural beeswax, acrylic coatings, or oil-based solutions, you can achieve the exact look and feel you want. Let’s explore how to bring out the best in your leather projects.
Why Leather Finishing Matters
Spending time creating a leather piece only for it to fade or wear out quickly is disheartening. That’s where finishing steps in. It strengthens leather against stains, scratches, and environmental damage while adding the final polish.
Leather finishing also gives you control over the final result. Whether you prefer a high-gloss shine, a subtle matte effect, or a rustic antique feel, finishes help bring your vision to life. No matter the type—vegetable-tanned, pigmented, or semi-aniline—taking time to finish your leatherwork can elevate it into something truly remarkable.
Natural Beeswax for a Classic Finish
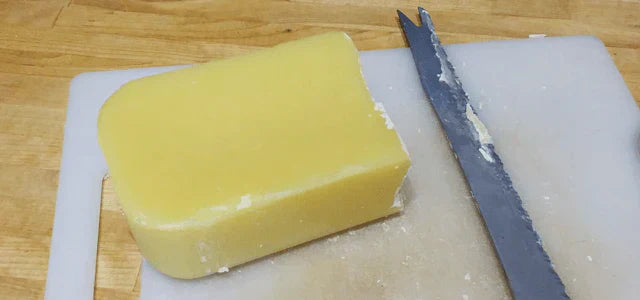
Beeswax is a timeless option for leather finishing. It not only conditions the leather but also adds a gentle sheen that feels handcrafted. Many artisans combine beeswax with olive oil for an all-natural balm that nourishes and protects.
How to Make and Use Beeswax Finish
What You’ll Need
- Natural beeswax
- Extra virgin olive oil
- Heat-safe container or double boiler
- Soft, lint-free cloth
Steps
- Melt equal parts beeswax and olive oil in a double boiler.
- Stir the mixture until smooth, then pour it into a container to cool.
- Once set, apply the leather balm evenly using a soft cloth.
- Buff lightly for a polished, silky finish.
This finish is excellent for adding character to your leather items while keeping them moisturised and resilient.
Acrylic Coatings for Extra Protection
Acrylic finishes are ideal when durability is a priority. They form a sturdy protective layer, shielding leather from moisture, scratches, and dirt. These coatings come in different finishes, such as matte, semi-gloss, or high-gloss, making them versatile for any project.
How to Apply Acrylic Finish
- Select the appropriate acrylic topcoat for your desired look.
- Use a soft brush or sponge to apply a thin, even layer to the leather surface.
- Allow it to dry completely before applying a second coat for added protection.
Acrylic finishes work particularly well on full-grain or top-grain leather, ensuring long-lasting protection without compromising its appearance
Restoring with Oil-Based Finishes
Oil-based finishes like neat’s-foot oil and mink oil are excellent for conditioning and restoring leather. They keep leather soft and flexible, preventing cracks and dryness over time.
Using Neat’s-Foot Oil
- Apply a small amount to a soft cloth.
- Work it into the leather with circular motions for even absorption.
- Wipe off any excess to avoid a greasy feel.
Neat’s-foot oil is especially effective for older or brittle leather, breathing new life into worn-out pieces.
Applying Mink Oil
Warm a little mink oil in your hands or on a cloth.
Massage it into the leather gently, focusing on areas prone to wear.
Let it sit overnight to fully absorb and protect.
Mink oil not only conditions but also adds water resistance, making it perfect for outdoor gear like boots and bags.
Getting the Best Results
Preparation plays a vital role in leather finishing. Follow these steps to ensure your project turns out exactly as planned.
Test Before You Commit
Always test your chosen finish on a scrap piece of leather or an inconspicuous area first. This ensures you’re happy with the result before applying it to the entire project.
Clean the Surface
Dirt or dust can affect how a finish adheres. Wipe the leather with a damp, clean cloth and let it dry completely before starting.
Burnish Your Edges
If your project includes exposed edges, burnishing adds a professional touch. Use a burnishing tool to smooth and seal edges before applying your finish.
Final Thoughts
Leather finishing is more than just a functional step—it’s a way to make your creations truly shine. Whether you’re restoring old leather or perfecting a new piece, investing time in finishing will pay off with stunning results. Experiment with beeswax, acrylic coatings, or oils to find what works best for your style. With the right techniques, your leatherwork can stand out as both beautiful and durable.
Guides
Contact
Contact Information
📞 Phone: 0412 127 327
📧 Email: admin@leathercircle.com
📍 Location: Epping, VIC 3076
🔒 Safe & Secure Checkout

Leave a comment: