
How to Clean and Condition Leather Like a Pro
Posted on
The Ultimate Guide to Leather Care
Leather is a material loved for its elegance, durability, and ability to improve with time. Proper care can keep your leather items looking spectacular for years, whether it's a cherished leather jacket, a favourite handbag, or a high-end piece of furniture. Cleaning and conditioning leather isn't just about removing dirt and stains—it's about protecting it for the long haul and keeping it supple and beautiful.
This guide will show you how to clean and condition leather effectively, ensuring your items retain charm and stay in excellent shape.
Know Your Leather
Before cleaning, you must identify the type of leather you're working with. Different types require different care methods. Here's a quick breakdown to help you:
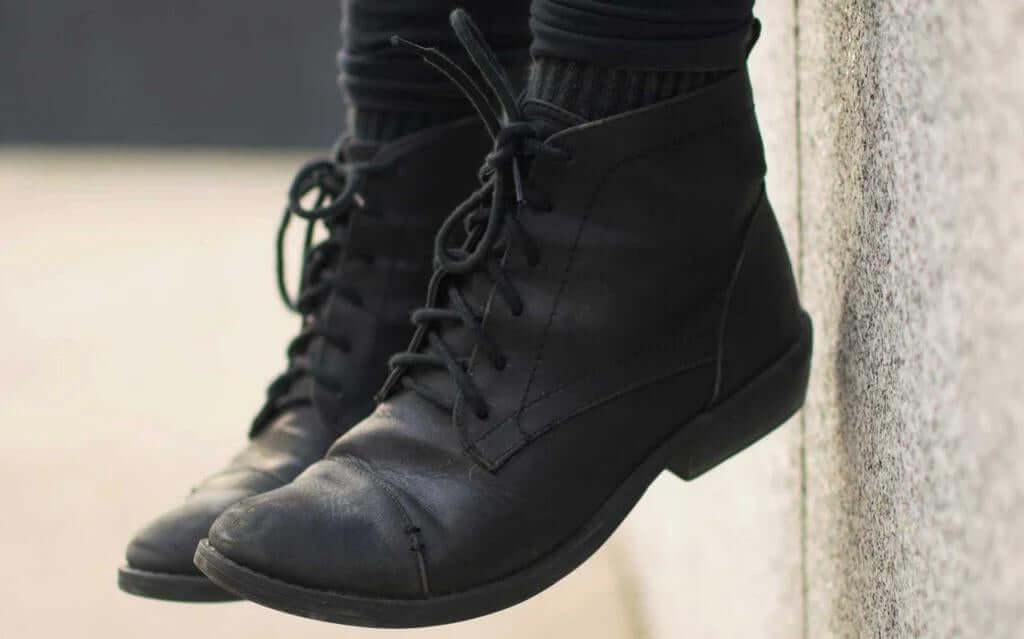
Cowhide Leather
Durable and versatile, cowhide is an excellent choice for everyday items such as belts, wallets, and furniture. It endures regular use and effectively complements most leather care products.
Nappa Leather
Renowned for its softness, Nappa leather is frequently found in high-end products such as gloves and luxury car interiors. It demands gentle care to preserve its smooth surface.
Aniline Leather
This untreated leather showcases natural textures and markings, making it gorgeous but more prone to staining. Handle with care and avoid spills.
Semi-Aniline Leather
With a light protective coating, this type balances beauty with resilience. It's slightly tougher than aniline but still shows off its natural grain.
Pigmented Leather
This type has a protective finish, making it ideal for furniture and car seats. It resists stains and scratches better than other types.
Suede
The Soft, velvety suede requires special cleaning tools and products to prevent damage. It's prone to water spots and dirt buildup, so handle it carefully.
Nubuck
Similar to suede but sanded on the grain side, nubuck has a smooth, velvety feel. It also needs specialized care to protect its delicate surface.
Essential Tools and Supplies
Before starting, gather the right tools and products. The wrong materials can damage your leather, so preparation is key.
Tools You'll Need
- Soft Cloths: Use microfiber or cotton cloths to clean, condition, and buff the leather. Avoid rough fabrics that could scratch it.
- Leather Brush: Perfect for maintaining the texture of suede or nubuck.
- Toothbrush: A soft-bristle toothbrush works wonders for detailed areas like stitching or crevices.
- Vacuum with Brush Attachment: Great for removing dust from furniture or large leather pieces.
Supplies You'll Need
- Leather Cleaner: Choose a pH-balanced cleaner designed for leather. Harsh chemicals can ruin the material.
- Leather Conditioner Keeps Leather hydrated and soft while preventing cracks. Depending on the type of leather, it is available in creams, oils, or waxes.
- Leather Protector: Adds a barrier against water and stains without altering the leather's texture.
- Specialized Suede Products: Use cleaners and sprays specifically designed for suede or nubuck.
- Distilled Water: Avoid tap water, as it can leave mineral stains.
How to Clean Leather
Regular cleaning helps remove dirt and grime that can weaken the material over time. Follow these steps for safe cleaning:
1. Dust and Wipe
Start by removing loose dirt with a soft, dry cloth. Use a small brush or vacuum with a narrow nozzle for hard-to-reach spots.
2. Test Cleaner on a Small Area
Before applying a leather cleaner, test it on an inconspicuous spot. This step ensures it won't discolour or harm the leather.
3. Apply Cleaner to a Cloth
Never pour the Cleaner directly onto the leather. Instead, dampen a soft cloth with the product. If it's a spray, apply it to the cloth first.
4. Clean in Gentle Circles
Work the Cleaner into the leather using light, circular motions. Avoid scrubbing, as it could damage the surface.
5. Treat Stubborn Spots
Apply a little Cleaner to the cloth for tougher stains and gently work it into the area. Be patient—gentle repetition is better than aggressive scrubbing.
6. Remove Residue
Wipe off any excess cleaner with a fresh, dry cloth. Leaving Residue can attract dirt or interfere with conditioning later.
7. Let It Dry
Allow the leather to air dry thoroughly in a well-ventilated area. Please keep it away from direct sunlight or heaters, which can cause cracking.
How to Condition Leather
Conditioning is just as important as cleaning. It replenishes oils lost over time, keeping the leather soft and crack-free. Here's how to condition Leather:
1. Start with Clean Leather
Leather should always be clean and dry before conditioning. Applying conditioner to dirty leather will trap grime and cause damage.
2. Choose the Right Conditioner
Match the conditioner to your leather type. For example:
- Use cream-based conditioners for finished leather.
- Choose oil-based products for oil-tanned leather.
- Pick gentle conditioners for vintage pieces to avoid over-darkening.
3. Apply in Small Amounts
Apply a small amount of conditioner with a clean cloth. For wax-based products, using your fingers can be effective.
4. Work in Sections
Rub the conditioner into the leather in circular motions. Focus on areas that see heavy use or appear dry.
5. Allow Time to Absorb
Allow the conditioner to penetrate the leather for 15 to 30 minutes. This assists in thoroughly hydrating the material.
6. Buff to Shine
Use a clean cloth to remove excess conditioner, then buff in circular motions to enhance the natural shine.
Special Care for Suede and Nubuck
These materials need unique care to stay looking their best.
Cleaning
- Brush Regularly: Use a suede brush to lift dirt and restore the nap. Brush in one direction.
- Remove Stains: Dry stains can often be removed with a suede eraser.
- Blot Liquids: For spills, gently blot with a soft cloth instead of rubbing.
- Use Specialized Products: Only clean suede with products made specifically for it.
Protecting
Spray a suede protector evenly to guard against water and stains. Always follow the product instructions.
Homemade Methods vs. Store-Bought Solutions
While professional products are reliable, some DIY options can work for basic care:
DIY Cleaner
Mix equal parts distilled water and white vinegar. Use sparingly with a soft cloth.
DIY Conditioner
Combine two parts beeswax, one part cocoa butter, and one part almond oil. Melt the mixture, let it cool, and apply it lightly.
Professional Products
Brands like Leather Honey, Lexol, and Chamberlain's offer cleaners and conditioners tailored to specific leather types. These are often more predictable than homemade alternatives.
Tips to Keep Leather Looking Great
- Avoid Water Damage: Use protectors and keep the leather dry.
- Keep Leather Out of Sunlight: Prolonged exposure can fade and dry out leather.
- Stay Away from Heat: Heaters can dry and crack leather over time.
- Regular Dusting: Wipe weekly to remove dirt buildup.
- Use Proper Storage: Store items in breathable bags or containers.
- Condition Regularly: Frequent use means conditioning every 3–6 months.
When to Call a Professional
Sometimes, at-home care isn't enough. Seek a professional if:
- You're dealing with deep stains or mould.
- Repairs are needed for tears or structural issues damage.
- Vintage pieces need restoration.
- The leather requires colour correction.
Final Thoughts
Properly caring for leather keeps it looking incredible while extending its life. Cleaning and conditioning leather may seem like a chore, but it's worth it in the long run. These steps will help maintain your leather goods in excellent condition, allowing you to enjoy them for many years. Give your leather the care it deserves, and it'll reward you with timeless beauty and durability.
Leave a comment: